Saving Money Without Sacrificing Quality of Our DIY Bathroom Remodel
Ever considered a DIY bathroom remodel? Read on — it’s more affordable and probably much easier than you’d expect!
We moved into our home in August of 2013. We’d been searching for a couple of months while living in our RV, during a summer where temps frequently creeped up over 110. Two adults, two kids, two dogs and a turtle. It was a long summer, with interest rates rising and homes in short supply. Bidding wars were frequent and too many sellers were letting their properties go to investors, who would then flip the house after doing some work. We didn’t have the luxury of waiting for the right house, as our son was due to start school and RV-living was getting old, so we decided to be more flexible with our “wants and needs” list.
Instantly, we found a home that had so much of what we wanted and we won the bidding war that evening. We lost RV parking due to a short driveway, and our back yard is very small, but the layout inside is exactly what we were hoping for. It was in good shape, but cosmetically had some issues — like an extremely outdated downstairs bathroom, all new outlets and window latches — and needed all new appliances. We started painting and making changes that evening. Not long after, we started landscaping the back yard. Before we knew it, years had passed and we hadn’t touched the bathroom. It is our guest bath and teen son’s bathroom and the one everyone uses downstairs, but it had this awkward shell sink that must have been a leftover from the ’80s that somehow made its way into our house when it was built in the ’90s.
Look at this baby up close.
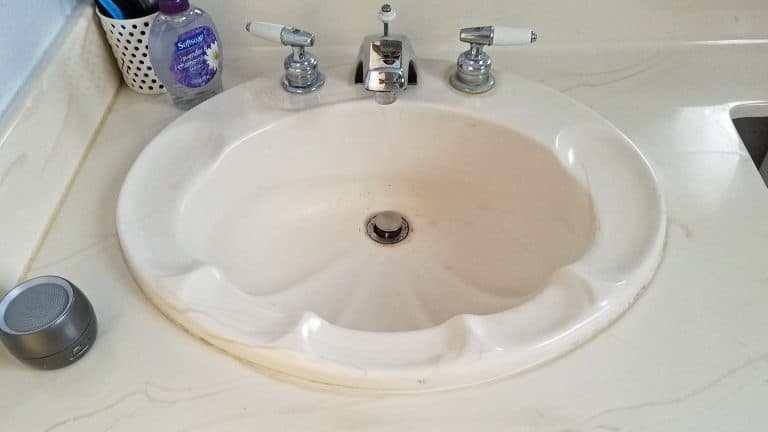
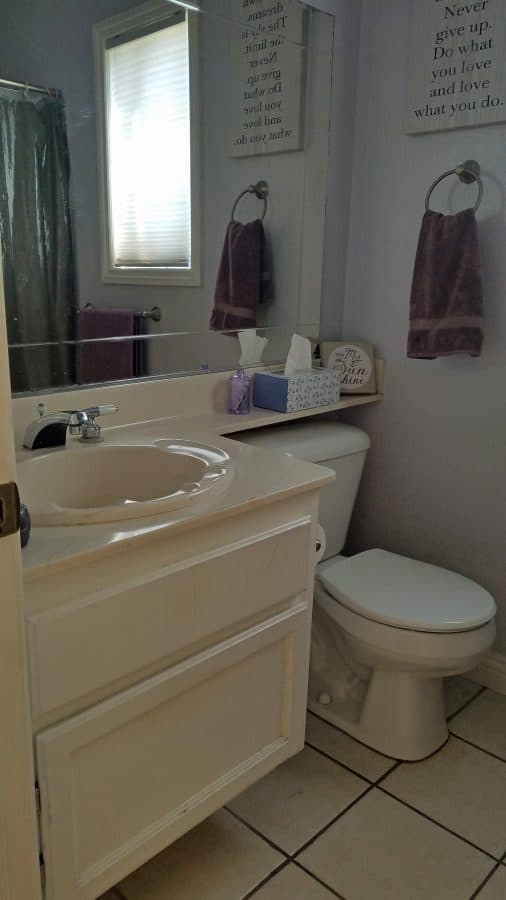
And that’s after I cleaned it. Stained, scratched and with hardware that didn’t even sit straight, it was in bad need of a remodel. We knew we could do it, but it meant not having the bathroom available for a few days. It all functioned fine, so it wasn’t a priority….but after almost four years, it was getting on my nerves. Bad. I hated going in there. I could decorate it as nice as I wanted and nothing was going to change the fact it spoke of an era that didn’t fit the rest of my house. And it was just plain ugly. The tile was cracked and stained beyond cleaning. No amount of nice towels and new paint was going to fix it up sufficiently. We’d already repainted and put in a new medicine cabinet but it was like putting lipstick on a pig.

Remodeling can be scary. It can get expensive and surprises almost always pop up. We didn’t want to sacrifice the quality or the style in order to save money, so with some shopping, a lot of patience and a little flexibility, you can do a DIY bathroom remodel that meets your budget and the look you seek. The vanity we ended up with was initially twice the price, but we went on the weekend where bathroom accessories were on sale. If you don’t want to pay everything up front or on your credit card, they also offer 6-, 12- and 24-month interest-free financing. Keep an eye on the sales flyers. This year, we saw them around July 4th and Labor Day, and I’m sure there are more. Try visiting the store during the week day if you can; that’s when there were more project managers available to provide specific help for bathroom remodels. Know what you want before you go in, be willing to maybe change it up a little, and have everything measured — twice — before you make your purchases. From how many holes your faucet has to where your under-sink pipes are and the size of your inset or wall-mounted medicine cabinet, it’s easy to make a mistake if you don’t do your pre-shopping homework.
And take pictures — lots of pictures — of the room you’re remodeling before you leave. It will save you from calling your teenage son and maybe waking him up so you can ask a cranky kid to climb under the sink and take a picture.
One thing to keep in mind: finding a matching set of everything — vanity, mirror, shelves and medicine cabinet — all in one color is a lot harder than you might think. I don’t know how many times we went shopping, thinking we’d walk in and find it. Wrong. We didn’t want one of the more common colors, oak or white, and we also had some size limitations. Finally, we found it in Lowe’s, the dark brown espresso color, so dark that it’s almost black. The mirror, the vanity, the medicine cabinet and a shelving unit for over the toilet all match perfectly in a color that’s a step beyond and matches my color scheme of light purple and black, with just a little grey.
With those choices out of the way, we moved onto the rest of the list. It was long. LONG. As in, two rolling flatbed carts and a few things that had to be special ordered long. We had to leave our carts on the ends sometimes in order to get to things, and at one point, came back to our things all moved around and a nice pair of Ray-bans on top — whoever rifled through our stuff must have thought it was a go-back cart or something. (Sir, your Ray-bans were turned into Lost and Found.) We purchased all the accessories, the towel bars, the new shower curtain and hooks and bar, the lighting fixture, decor and more. The tile took us a bit, because we didn’t want flooring completely different from the rest of the house but it still had to match. We found a grey slate ceramic that is durable enough for the frequent use, sturdy enough for a teen boy stomping around in there, and won’t show every speck of dirt. Score all the way around!
If you’ve ever remodeled a bathroom, you know there are a lot of steps. If not, here’s a quick breakdown. Empty the bathroom of stuff. Rip out the flooring. Turn off the power and water. My fave part…not? The toilet being moved. I was so afraid they’d put it out front. The front door is right next to that bathroom, around a slight corner, and putting the toilet on my front sidewalk, under the overhang, wouldn’t have been totally out of the realm of possibility of my sons and husband. Thankfully, they did not do that. (I did, however, find that awful shell sink out front! Why? “It could be a planter.” OH no way.)
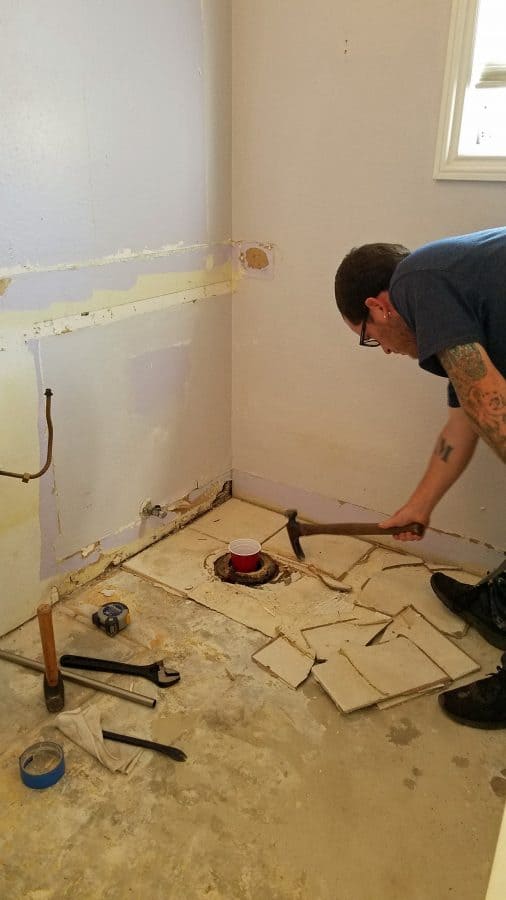
That little red cup was the perfect fit to prevent anyone from stepping in the toilet hole. Ewwww.
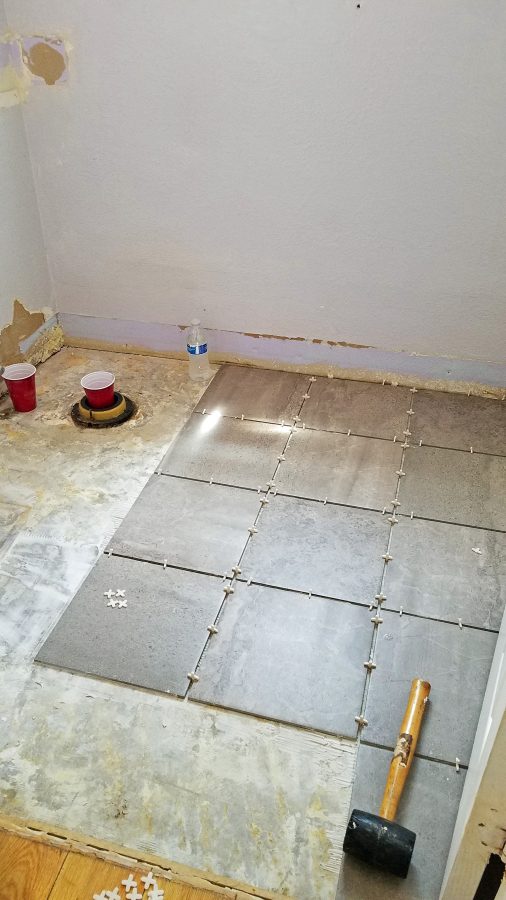
Flooring went in first. They did such a fantastic job.
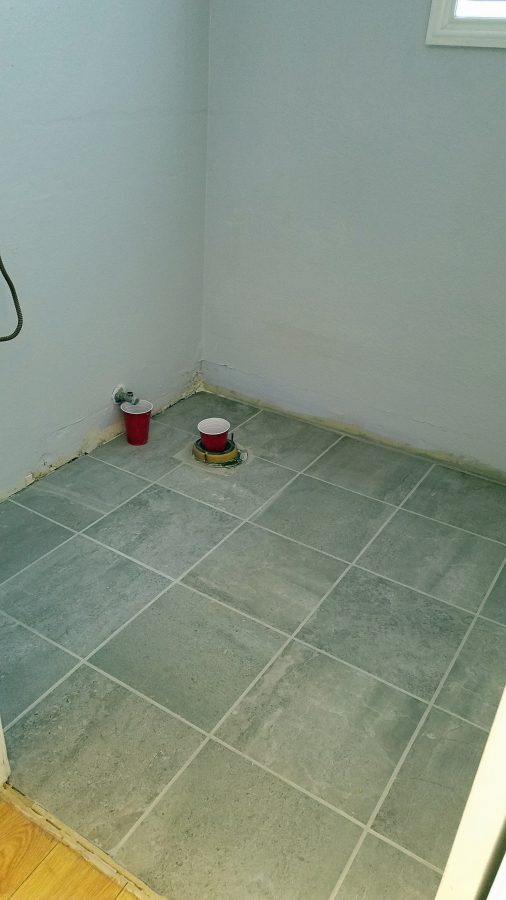
Who knew there were so many steps? If you have a leaky water fixture, those red cups helped keep the water off the floor until the plumbing was fixed, which didn’t take long…..though it did take a few trips to the store for the right fittings/connections. Disclosure: we did not do the tub. We may at a later date. It’s a full bathroom and I’d like to keep it that way. My son plays football and he does at times take baths with epsom salts, and I’d like to retain that possibility. We envision a lot of pretty tile on the walls and fancy overhead shower fixtures, but that’s a renovation for a later date.

Paint. New baseboards. Hang the rods and toilet paper holder. Put in the new lighting fixture. Find the right Edison bulbs. It spilled out of the bathroom and into the foyer and even the living room and stairs, but what do you do? I did learn that if/when we take on a huge project, I may have to get a hotel. Or maybe the RV again??
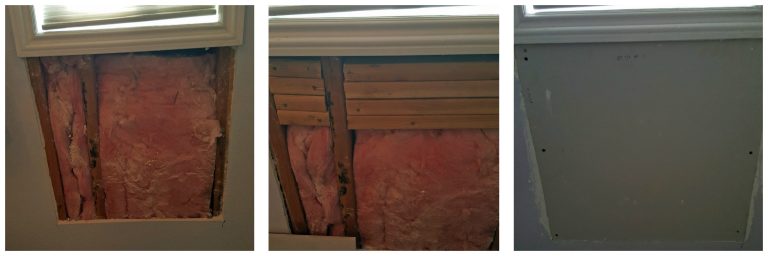
Then, realize that there are no studs to hold the towel bar where it’s even and centered, explaining why it always came loose before. Rip out a huge section of wall, get crafty and put in new 2″ x 4″s to hold it, re-do the wall, paint more.
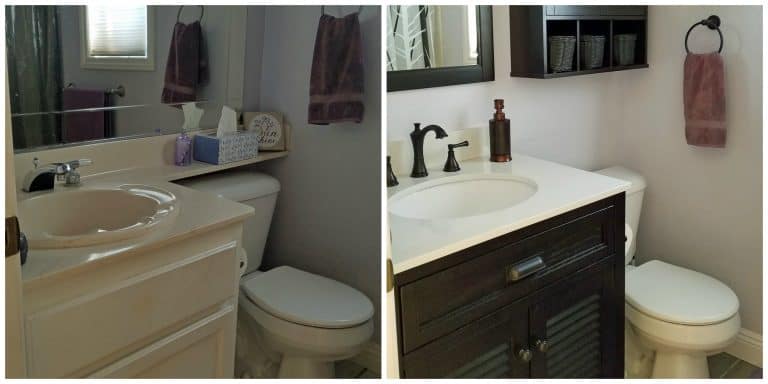
Two long days and then a few hours on a couple of other days working out some kinks, like the strip that covers the transition from bathroom tile to hallway laminate and one remaining baseboard, and it was done. It’s gorgeous. If you don’t think you can get excited about a bathroom remodeling, you haven’t done it yet. The before and after on this — all for around $900 — is an amazing difference.
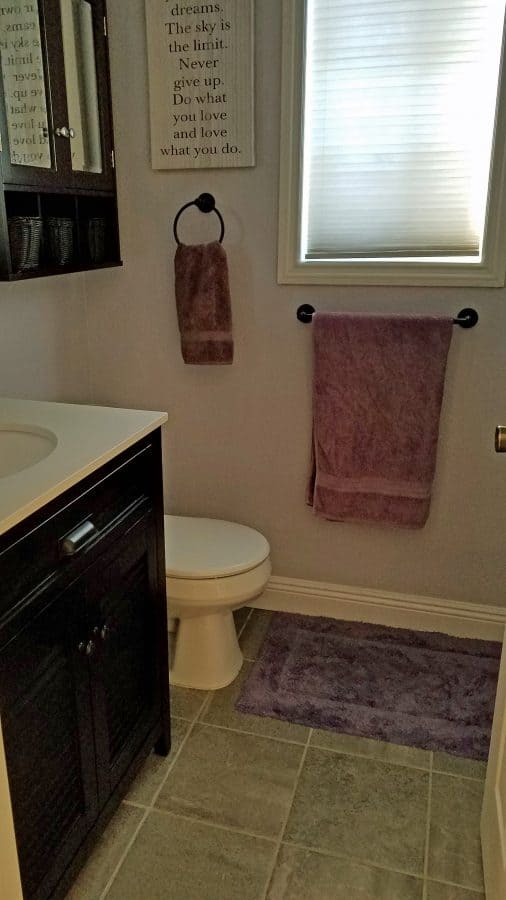
I love it! The below before and after shows it best. I’m so pleased with the shelving unit and glad we changed our minds and went with the dark fixtures instead of the brushed nickel we’d initially chosen.
Lowe’s was wonderful throughout the whole process. A department manager saw us, during our big shopping trip, and stored our carts for us while we shopped for the remaining smaller items. She helped us place an order for special lighting for our foyer, hall and game room and even ran around securing other items we needed, as we were upgrading the backyard with sails, cushions and other small items. She saved us a ton of time by having the carts rung up and packed up so we only had to add on our paint choices. When we had to go back for a few things, like pipe fittings or bulbs, they were just as helpful as they were the day we spent $2500. (Paint for our hallways, the new lights, a new stove backsplash and island top added up.)
The bathroom is bright, the faucets gleam and it’s a much more pleasant place to visit…and with a large family and a lot of people coming in and out, it gets visited a lot. Thank you, Lowe’s, for making our DIY bathroom remodel affordable and what we envisioned. (This is not a sponsored post — we’re just that happy we went with Lowe’s when making our purchases!)
And the shell sink is gone. It was destroyed — sadly, not by me, I really wanted to be the one to swing that sledge hammer — and sent off to the dump. I haven’t missed it a bit.
Related Post: Best Kitchen Brands to Consider for Your Kitchen Remodel