Shopping for Hatch Chile Recipes at Smart & Final
It’s a popular time of year for foodies, a time of year that isn’t static depending on the season and a time that spices up a lot of meal plans: Hatch chile season. These green chile peppers, in varying degrees of heat, are popular in appetizers, entrees and even desserts, resulting in a long list of Hatch chile recipes. Below I’m going to share one of them, as well as what to do if you’re not close enough to a local Hatch chile roast!
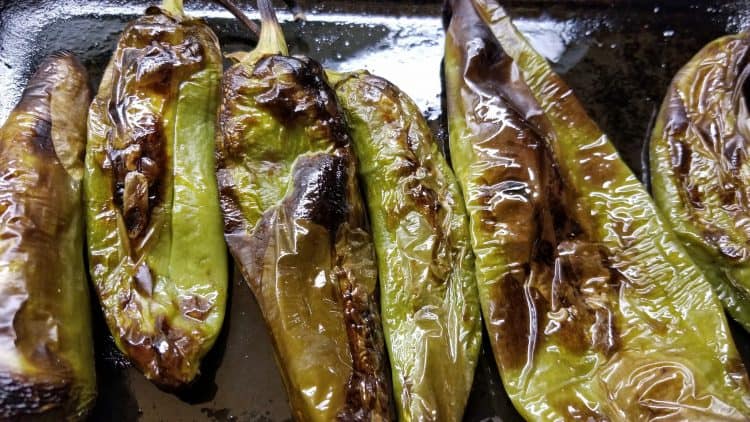
Hatch chiles are a beautiful green color to start. When roasted, their skin peels and bubbles and turns brown. When dried, they are a deep, dark reddish-brown, almost a rush color. The Hatch chile options don’t stop there though! Melissa’s Produce sells the chiles fresh, but they also sell them in powdered form. This is one of my favorite use of the Hatch chiles, because you can use it year-round and in so many ways! There are so many Hatch chile recipes available online, you’ll have more options than you do peppers.
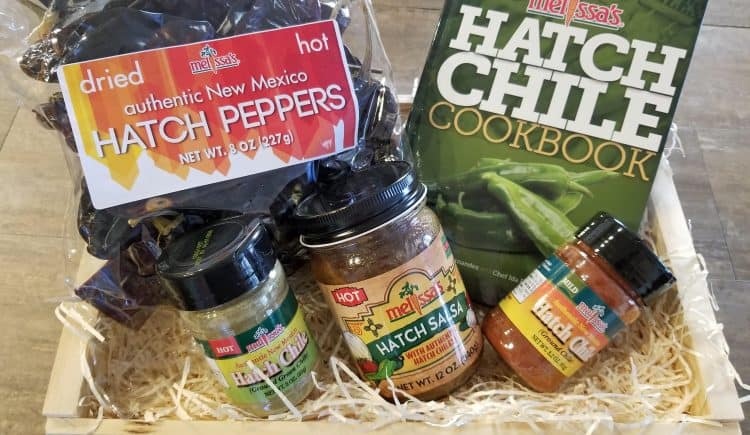
This post is sponsored by Smart & Final, but the photos and words are my own! (Also, thanks to Melissa’s Produce for supplying the basket to Smart & Final!)
Melissa’s Produce is a great place to stock up on your Hatch chile needs, but they also host Hatch chile roasts at various locations throughout Southern California, like a recent one on Sept 7 at the Orange location of Smart & Final. You can smell the chiles from a distance, and it’s a fun event if you’re able to find one. Buy the chiles on-site and go home with however many you can store for your favorite Hatch chile recipes.
But what happens if you can’t get to a Hatch chile roast? You can roast the chiles at home! I am about 45 minutes away from the closest roast location, and as much as I wanted to go, I couldn’t make it happen. I was given some chiles by Melissa’s Produce and I now have a stash of roasted Hatch chiles for use in many foods. I can keep the chiles in big pieces and put them on chicken breasts, in chicken sandwiches, on burgers (turkey, beef or veggie, or even a salmon burger), in pita sandwiches with roasted veggies and a good Monterey Jack cheese, or in grilled cheese, one of my favorites.
I also have chopped up the roasted chiles and put them in scrambled eggs, into a batch of homegrown tomatillo green salsa, mixed them into moist cornbread, and even into cream cheese for a dip. So many ways to use Hatch chiles, roasted, fresh or dried! (Just be sure to test the batch first, to ensure you know the level of heat. There’s a funny story about how I tested a slice of a ‘mild’ pepper that turned out to be anything but, and I had burning eyes and nose for 24 hours because my hand was SO saturated! That led to a few jokes that are only funny now….)
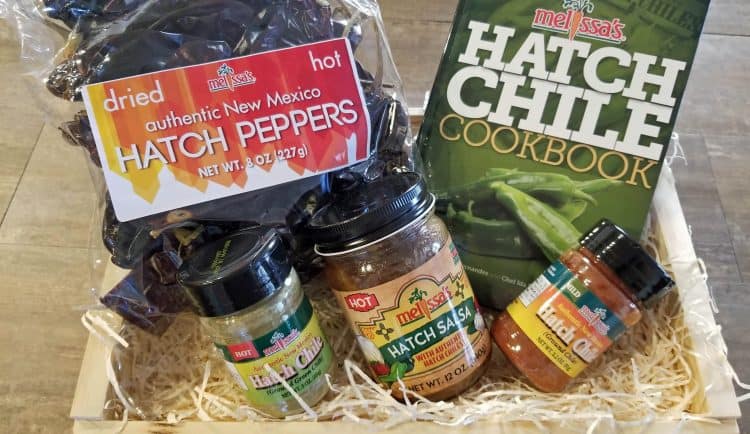
Courtesy of Smart & Final, I received this beautiful basket of dried Hatch chile peppers, salsa and two types of the powder, as well as gift cards to go shopping for more ingredients I may need. I love to do weekly shopping at Smart & Final! It’s no longer just a big bulk store, and their produce selection is fabulous as well as affordable.
Smart & Final also supplied me with this recipe for salmon. So easy and it only takes a few ingredients! Put them on your Smart & Final shopping list and be sure to enjoy Hatch chiles while you can! (The season is a little longer this year, but it can end any time so don’t wait!)
To Prep for Hatch Chile Recipes, Head to Smart & Final!
Grilled Salmon with Hatch Chile Cream Sauce
- Sun Harvest Extra Virgin Olive oil
- Salt and freshly ground pepper
- 2 green onions, finely chopped
- 1 cup roasted Hatch chiles, peeled and seeded
- 3/4 cup dry white wine
- 1 1/2 cups heavy whipping cream
- Juice of 1/2 lime
- Six 6-ounce First Street salmon fillets
Grilled Salmon with Hatch Chile Cream Sauce
Make the Green Chile Sauce:
Heat 1 tablespoon of olive oil in a sauté pan. Add the green onions and sauté until wilted. Add the hatch chiles and heat through. Add the white wine and simmer until almost dry. Add the cream and continue boiling until the mixture is reduced by half. Stir in the lime juice and season with salt and pepper. Transfer the mixture to the blender or food processor and blend until smooth, being cautious that the saucer is hot. Keep the sauce warm until ready to serve.
Grill the Salmon:
Brush the grill surface and the salmon with olive oil to prevent sticking. Season the Salmon with salt and pepper. Grill the salmon, uncovered, for no more than 5 minutes per side, depending upon the thickness. Serve at once topped with a generous portion of Hatch Chile Cream Sauce.
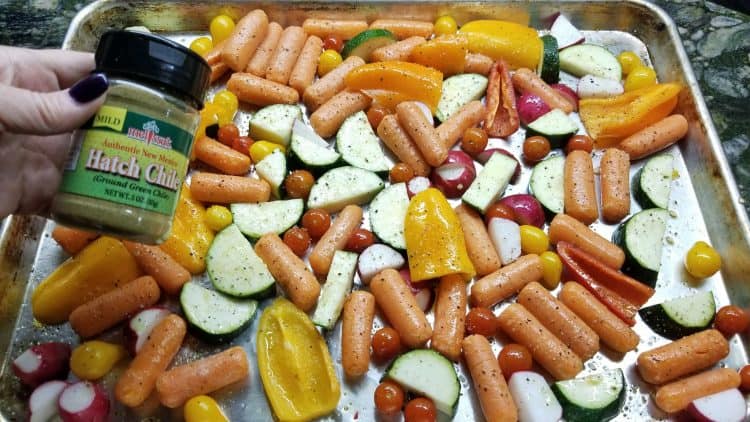
For dinner this evening, I used the Hatch green chile powder in a random way. I went through my produce drawers, selecting anything that wasn’t enough to feed the whole family for one meal — five radishes, one zucchini, seven mini-Bell peppers, some baby carrots, and a handful of garden-grown cherry and grape tomatoes. I chopped them all into bite-sized pieces, placed them on an oiled baking sheet and then drizzled olive oil over the top. A nice sprinkling of Kosher salt, some freshly ground Melissa’s Produce pepper and a nice sprinkling of the green Hatch chile powder, and boom, ready for the oven. Twenty minutes at 375 degrees and they were a perfect side dish!
As a Smart & Final ambassador, I am excited to share ideas with you for new ways to use the food you can purchase at the growing list of Smart & Final locations. As a busy mom of older kids, running a business and maintaining the house, feeding a large group of people most days, I am thankful to be able to pop into the local store, grab my fresh produce, meats, spices, condiments or canned items…or a sleeve of jell-o shot cups, a large box of individual bags of chips for my son’s spontaneous friend gatherings, a 12-pack of individual cookie servings…everything’s there. Prices are affordable, so I can keep my weekly grocery bill low while still creating delicious meals with quality items. These Hatch chiles add a fun pop of flavor and color and the family loves our ‘different’ meals. Win-win!
And if you want to roast your own Hatch chiles at home? It’s pretty easy! Oil up a pan, place clean peppers on it and pop into an oven at a high temp. I used 400 degrees today, watching the peppers closely so they didn’t get too roasted. Turn the peppers to evenly cook all the way around, then pop them into a quart-sized ziploc bag, seal it up and let them cool. The skins will literally just peel off when you roll them in your hands! You can wipe out the internal seeds and store in a fridge for use within a few days, or the freezer to keep longer. It’s not the same experience as attending an actual roast, but if you can’t get to one, it’s worth a try!
Create your own Hatch chile recipes or try the one listed above. Let me know your favorite way to use Hatch chiles!

