Make Frozen Inspired Jewelry With Your Cricut
I’m a new Cricut ambassador, and I’m learning as I go with my Cricut cutting machines. (I have the Cricut Explore Air 2 and Cricut Maker.) I’m a huge Disney fan and recently saw Frozen 2 again, which gave me the idea to make Frozen inspired jewelry. I’m no pro, but I’m learning, and I’m excited to share with you how you don’t need to be an expert at using the Cricut machines to make fun crafts and gifts!
This post is sponsored by Cricut! If you click on any of my product links and make a purchase, I may get a percentage via the affiliate links, so thank you!
First, the best advice I got yet was to think outside of the box. Have fun with the machines and try unusual things — even if it’s a one-off project, like seasonal earrings and a matching bracelet that are whimsical and simplistic. I wish I’d had this machine when my kids were younger, they’d have worn themed jewelry and t-shirts for every movie they liked and party they attended! (It’s really just that easy to throw things together quickly for special events, and the cost is minimal.)
Supplies to Make Frozen Inspired Jewelry: Cuff Bracelet and Earrings
- Faux leather in blue (available at Cricut.com)
- Glitter craft paint (silver)
- Fabric glue (I used Aleene’s ultra-flexible clear glue)
- One set of silver earring findings
- Jewelry cord (black, blue or silver)
- One sheet of cardstock (for test)
The tools you’ll need are:
- Cricut Explore Air 2 or Cricut Maker
- Cricut mat and weeding tools
- Tool to make holes in bracelet cuff
- Measuring tape
- Small craft paint brush
- Paper towels or reusable craft cloth (it will get paint on it)
Steps:
Measure your wrist.
Sign into Design Space. Open new project.
Select “Image” and search for “rectangle.” Select a narrow shape that you can stretch to the right dimensions, just a little more than the size of your wrist. (My wrist is 7″ exactly, so I measured the rectangle at 7.5″, leaving space for the clasp without leaving room for the bracelet to slip off.)
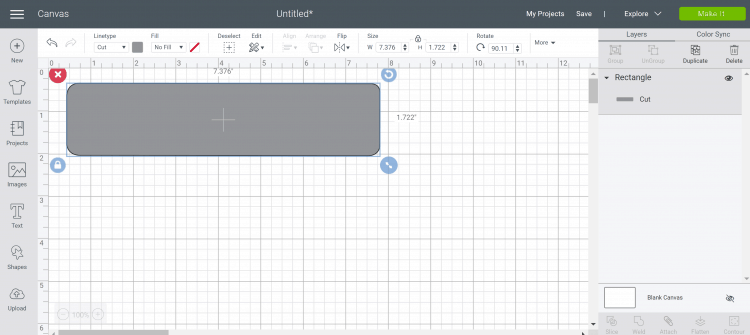
Place the rectangle shape on the grid so you can easily see the center of the shape, making it easy to center the shapes you will add next. (If it’s a vertical shape, as this one was, grab the icon of the round arrow and click to turn.)
Duplicate the rectangle and place it below the top rectangle. This will serve as the back layer of the bracelet. (If you skip this step, the pieces of the snow flakes will flare out and catch on things. The bottom layer is needed to give the bracelet stability and prevent the snow flake pieces from sticking out.)
Select “Image” and search for “snow flake.” Insert the image you choose onto the new project canvas. Grab the corner and resize it, placing it in the center of the rectangle.
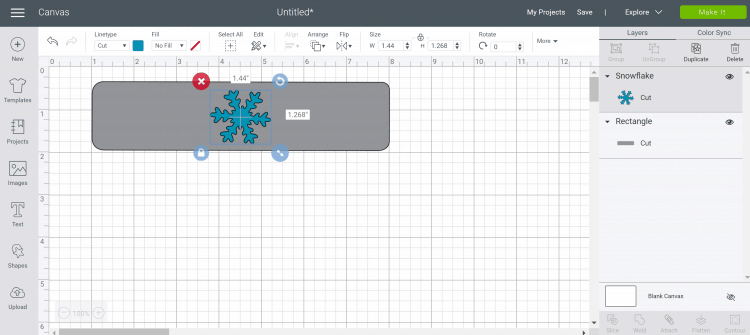
Select the snow flake, right click to “Duplicate,” and add two more snow flakes, centered between the middle snow flake and the end of the cuff.
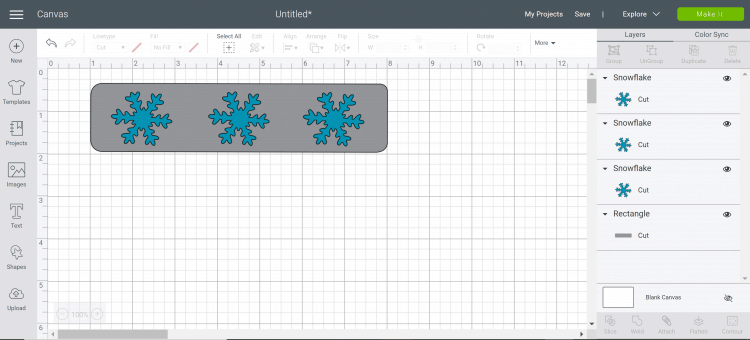
Click directly outside of the rectangle and select the entire shape/flakes. Towards the bottom right of the screen, click “Attach.” This tells the Cricut that you want the snow flake shapes cut out, and allows you to move the shape as one unit. Move it to the upper left of the canvas, wasting as little of the faux leather as possible.
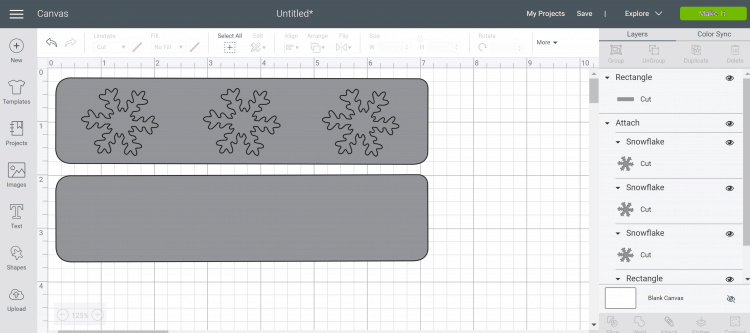
You’ll end up with something like this. See how the shapes are no longer colored? This is because they are all one piece essentially.
My suggestion here is to do a test run. Faux leather comes in small packages, so running a sheet of cardstock through the machine to ensure you like the results can save you on materials. You can also make sure the size of the cuff bracelet works for you. If you’re happy with the results, do it again with the real materials.
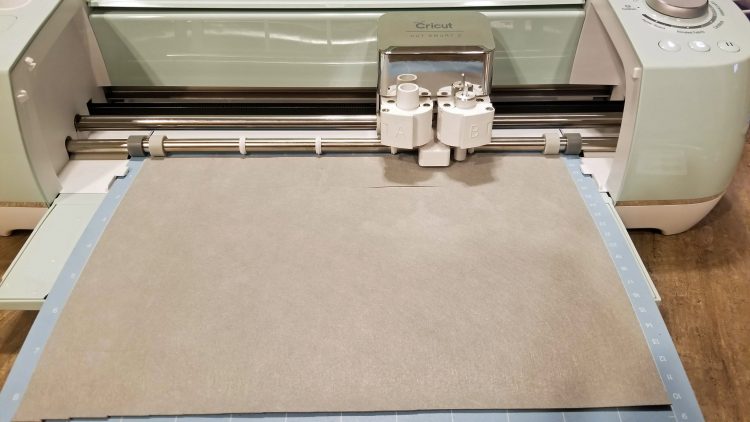
Get your mat ready, by placing the faux leather face-down and selecting the mirror option after you click “Make It.” Be sure to select the “Custom” option if you’re using the Cricut Explore Air 2, then select the faux leather option.
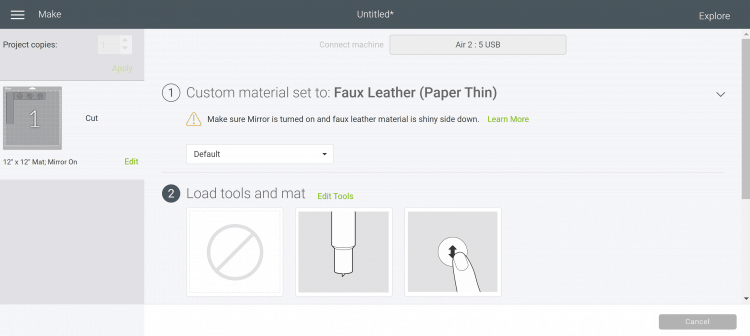
Load the mat as directed, then click the Cricut button to cut.
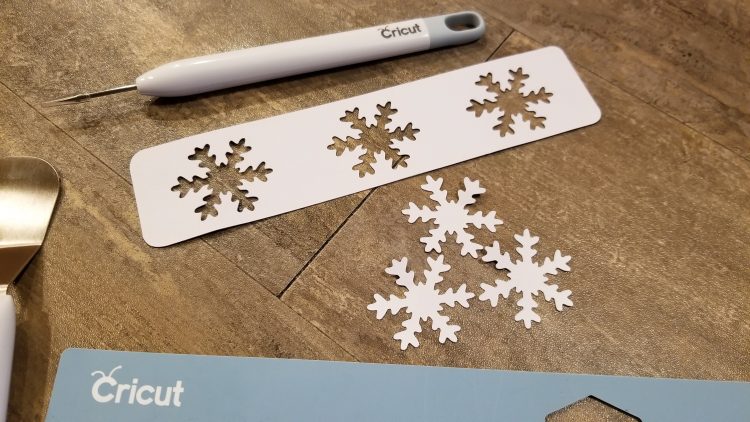
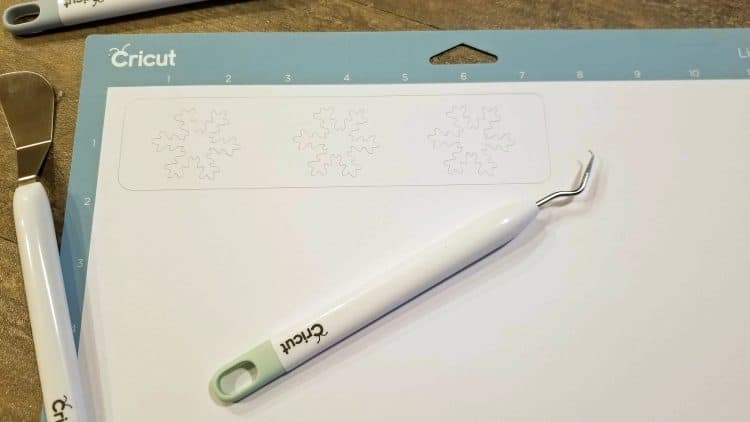
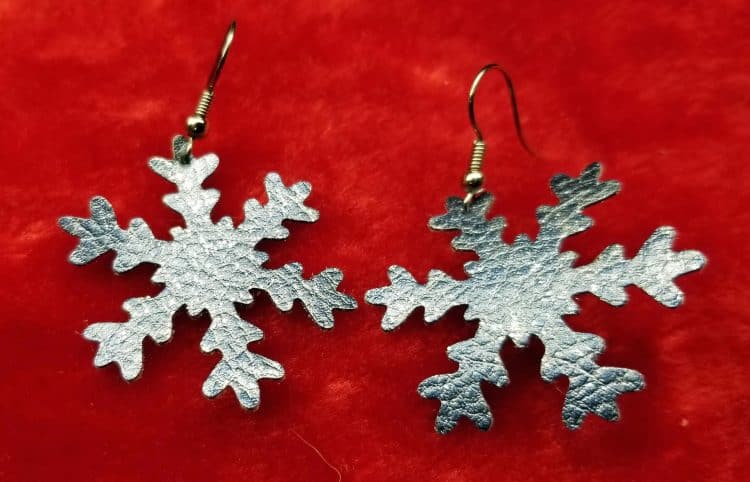
Weed the bracelet parts and keep the three snow flakes that were cut out. Two of them will become your earrings!
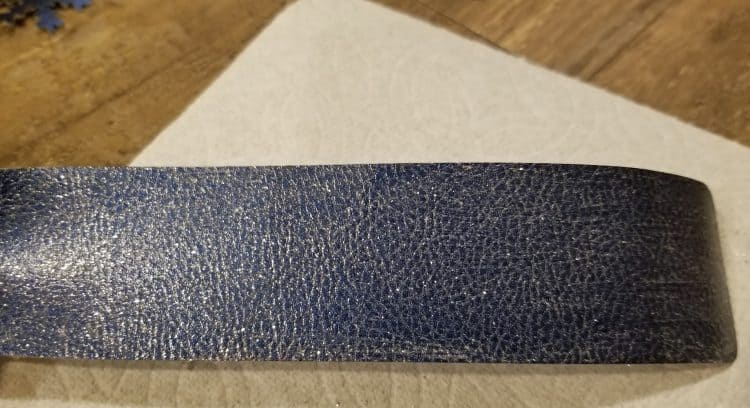
Lay out some paper towels and apply the silver shimmer paint onto the blank rectangle.
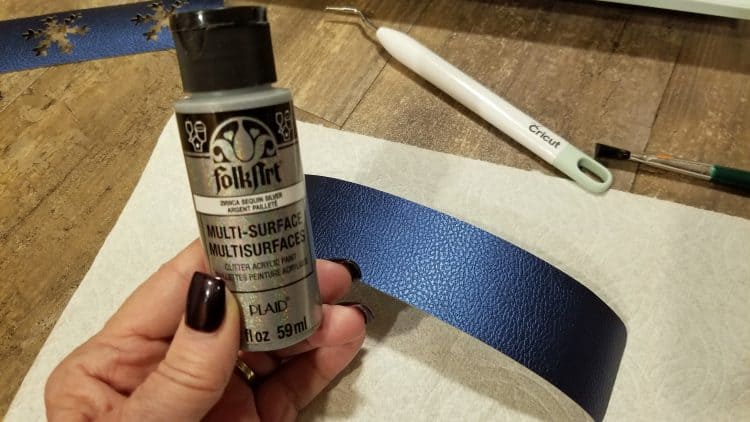
Rub it in with the craft cloth or another paper towel. Let dry and do it one or two more times, until you achieve the level of shimmer you prefer.
Repeat that with the two earrings. Let everything dry thoroughly.
When the rectangle is dry, use the fabric glue to attach the rectangle with the cutouts to the base rectangle that you painted. Apply liberally, ensuring you get glue on each part of the snow flake. If you miss little pieces, they may stick out when the bracelet cuff is worn. (It may still happen with wear, as faux leather is only so pliable, but it adds a little character and the shimmer paint makes it shine!)
My fabric glue recommended a two-hour wait, so during that time, I worked on the earrings. Using a sharp tool — I used one of the Cricut weeding tools — poke a tiny hole into the end of one part of each snow flake. Use the proper jewelry tool and open the closed loop of each finding. Put it on the earrings, close the loop back up, and your earrings are done!
If you want to make them fancier, you can dangle some shiny beads or rhinestones.
Once the bracelet is dry, poke two holes on each end of the two-layer leather cuff. (I used a grommet setting tool.) Cut the proper length of the jewelry cord and poke it through the holes, leaving enough room to tie a bow. There are quite a few ways you can do this. I chose a very simple lace-up, but you can be a lot more elaborate OR you can use a slide knot. You can either choose to tie the bow each time you wear the bracelet, or tie it just loose enough to get the bracelet on and off.
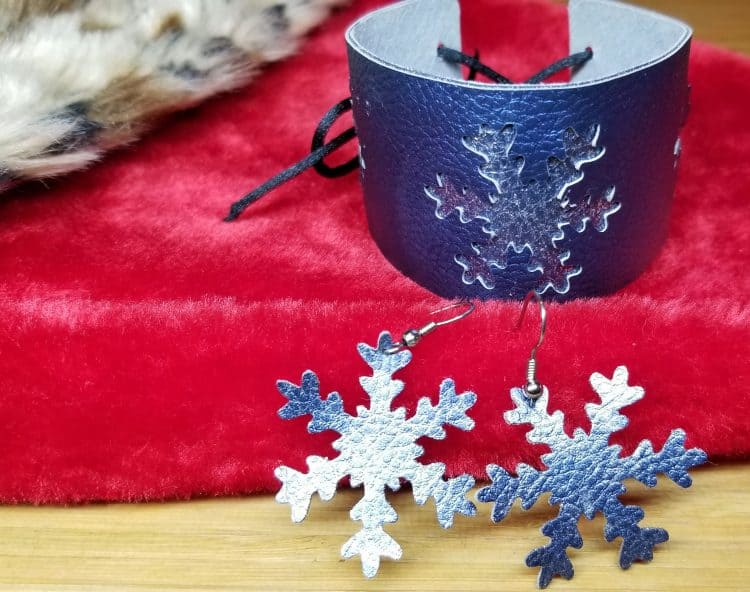
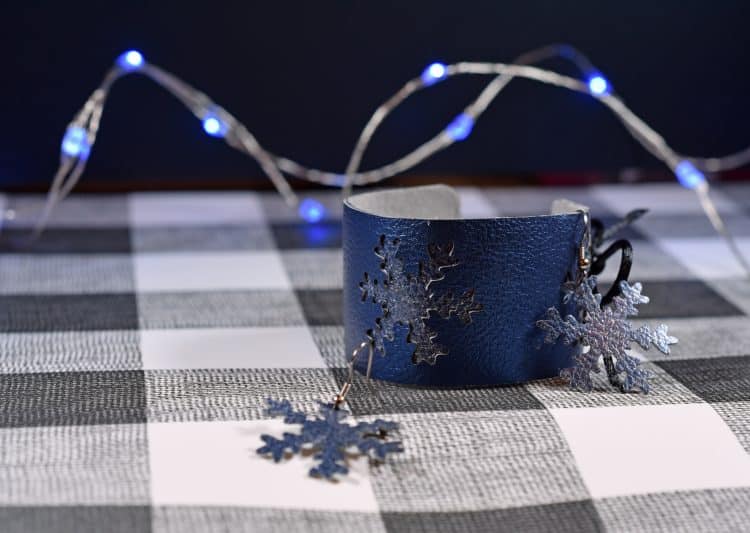
You’re done! It’s a fun matching set to wear on a cold winter day or any time you want to add a bit of Frozen fun to your attire. It’s just one of many easy pieces of jewelry you can make with a Cricut! I have already planned a fun pair of palm tree earrings, complete with little brown beads to represent coconuts for a bit of silliness.
Making this Frozen inspired jewelry only took about 30 minutes of craft time, and two hours of dry time for the bracelet. If you choose a less elaborate cutout in the cuff, you can probably skip the second layer, so it would be even faster. Choose a more narrow rectangle, or even add some beads or fringe. There are so many choices! Did you know you can write and draw with your Cricut? I share more about that here, where I made my Christmas gift tags. The kids loved them!
Whatever you make with your Cricut, be patient with yourself. Don’t expect to learn it all at once. Be okay with making mistakes. This Frozen inspired jewelry was my second go-round; the first bracelet didn’t quite turn out right and I almost got discouraged. Then I reminded myself that I was trying something new and I was lucky enough to have more faux leather.
It’s easy to look at all the fancy projects out there and wonder if you’ll ever get there. The answer is that if you keep at it, YES. I’m not there yet, but I know I will be. I learn more about the machine’s capabilities each time I use it, and that’s only going to continue. One good way to learn faster is to select a pre-existing project in Design Space. It will talk you through the steps, so you’ll learn step-by-step, like a tutorial. (And the projects in Design Space are gorgeous!)
If you want to make this Frozen inspired jewelry set, or even just the cuff bracelet or earrings separately, you can find my project here. Have fun!