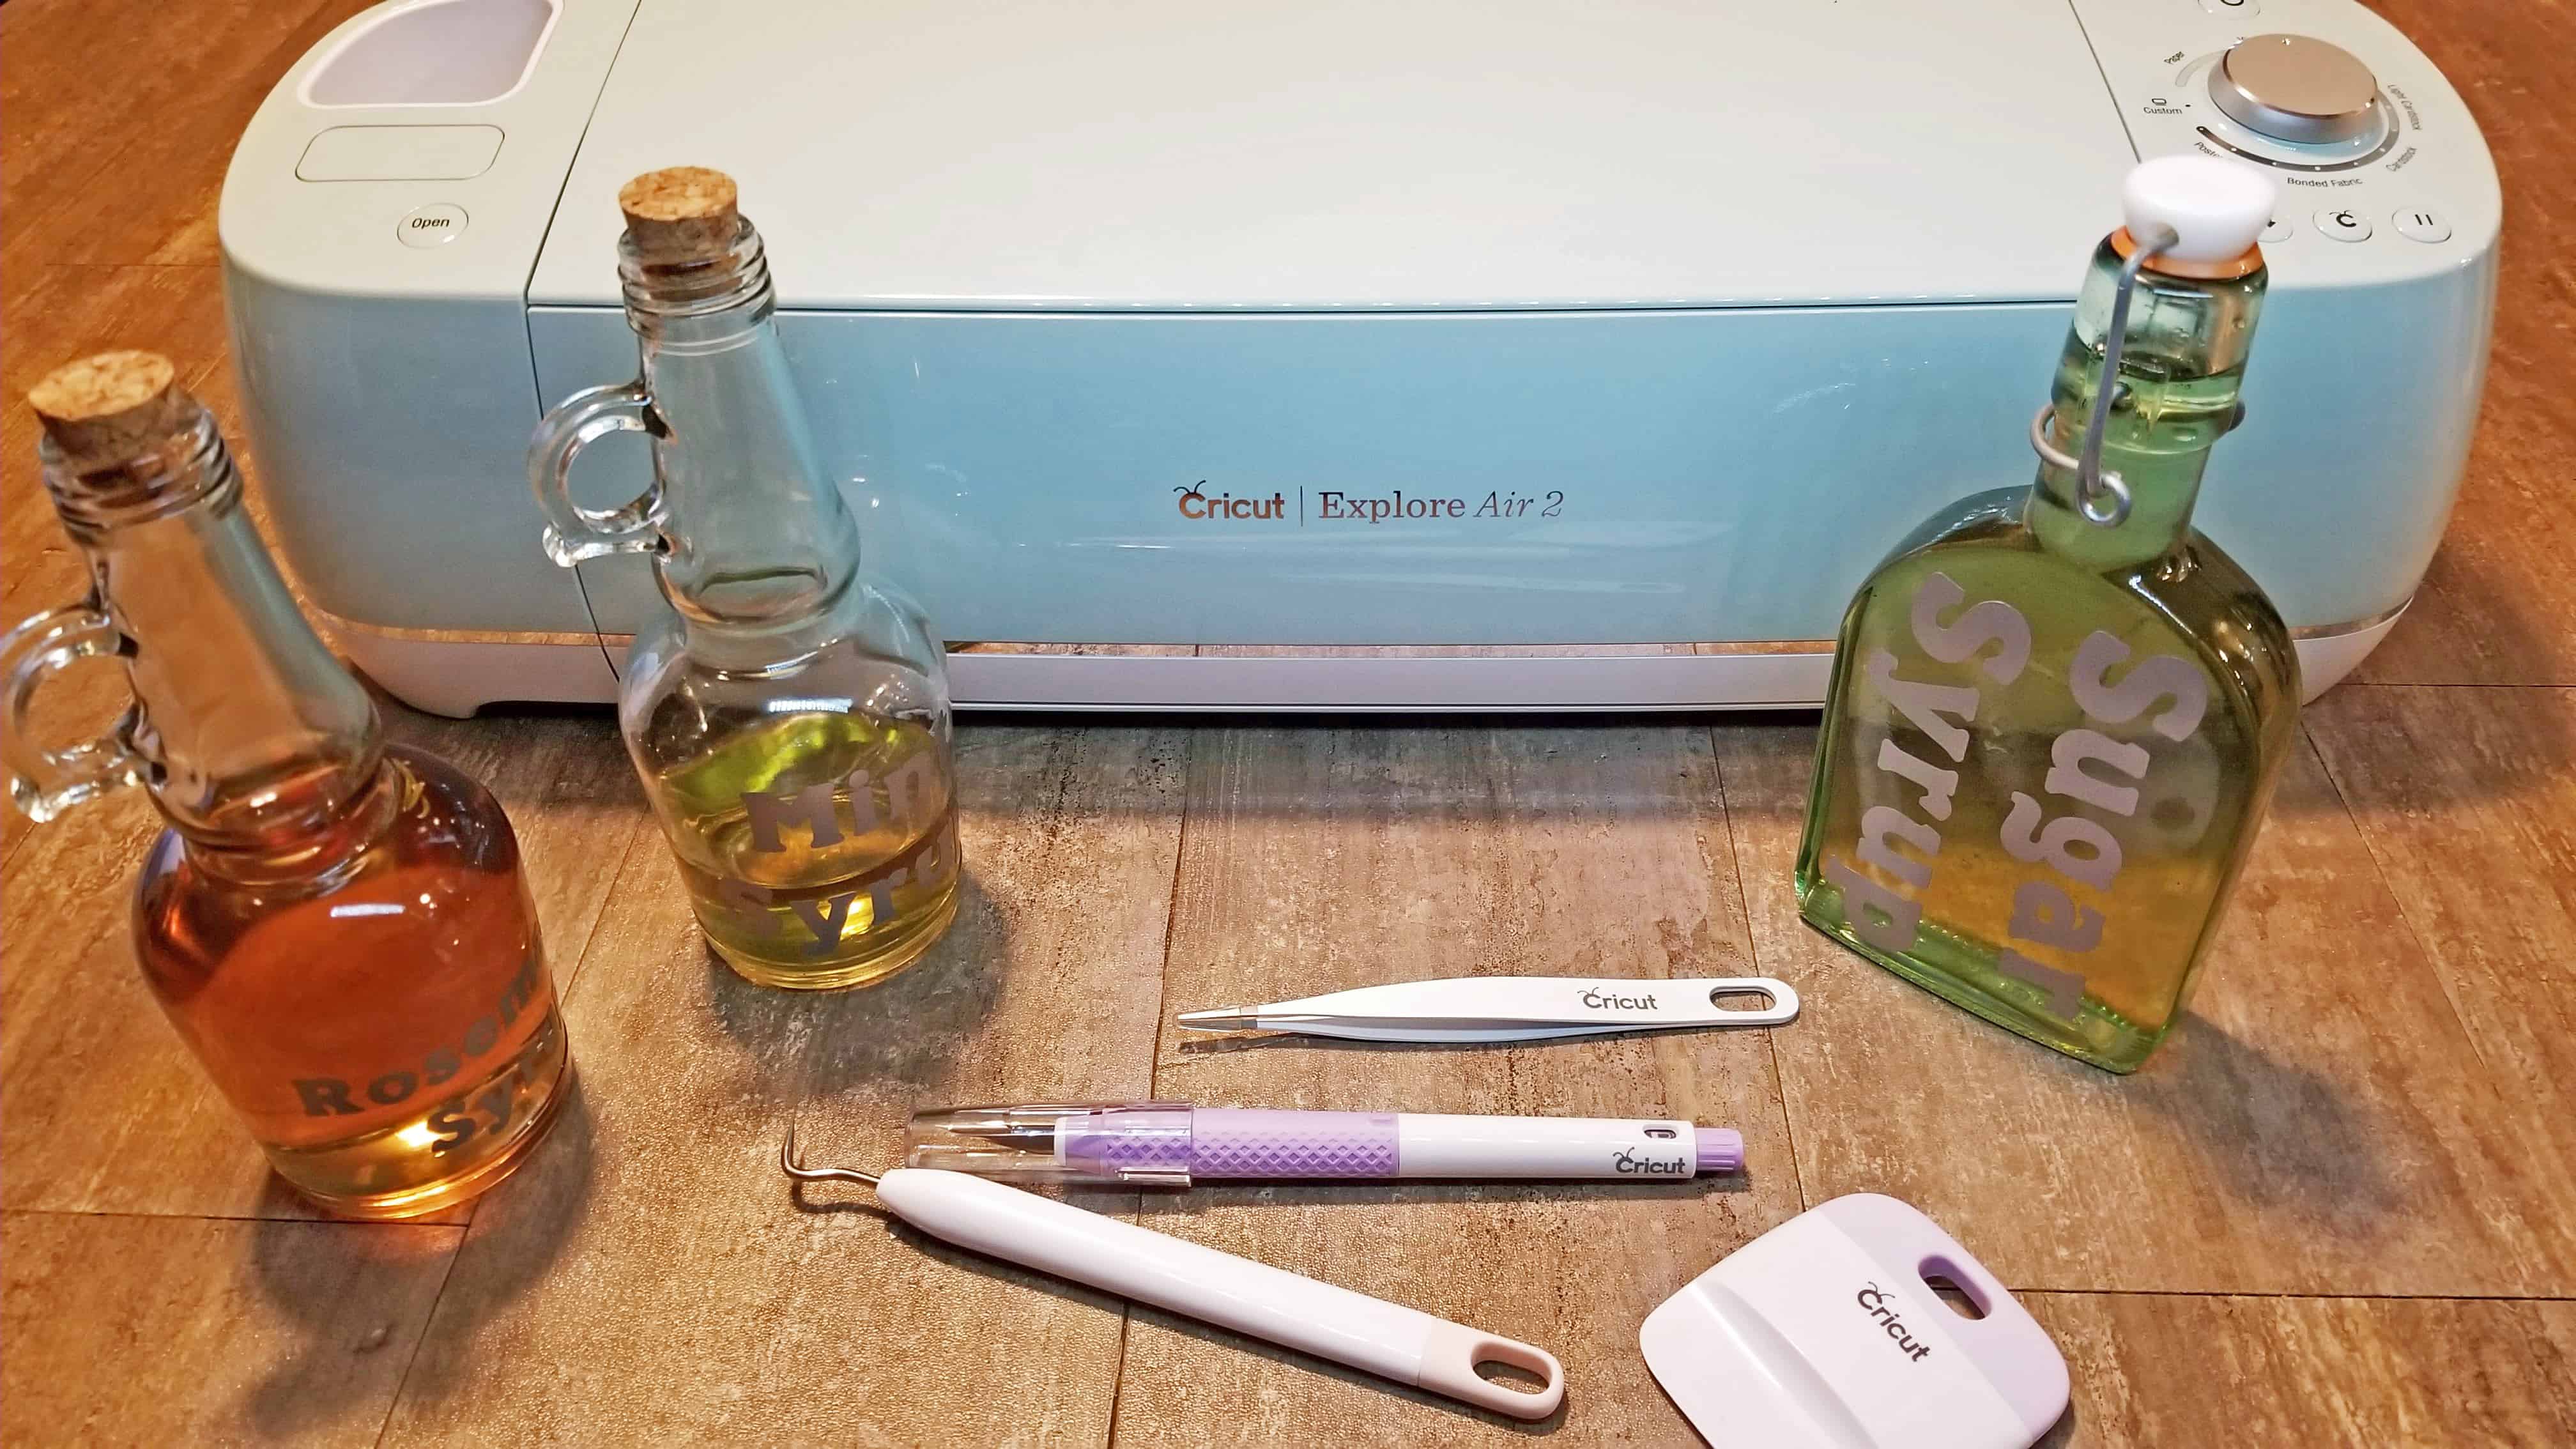
Using the Cricut Explore Air 2 to Make Christmas Gift Tags
This is a sponsored conversation written by me on behalf of Cricut. The opinions and text are all mine.
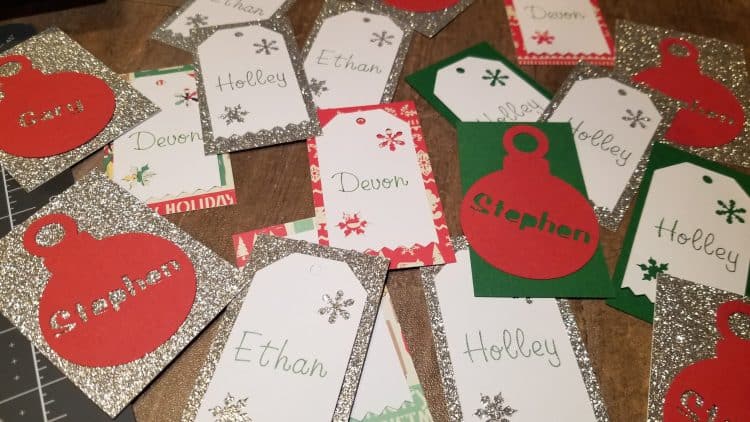
I love having a lot of kids, but large family life on holidays usually means a lot more work. More food to prepare, more gifts to buy, and more gifts to wrap. It’s all good, and I wouldn’t change a thing, but having four kids, two sons-in-law and a grandbaby obviously multiplies the work involved when I want to get cutesy with wrapping and applying Christmas gift tags to the multitude of presents piled in the corner of our room, under a blanket, not at all discreetly.
For the past <mumble-mumble-maybe 30> years, we’ve stayed up until midnight, or later, wrapping gifts. A little wine, a lot of Christmas carols and some sweets, it can be fun but by the time we’re done, there’s no time left to add personal touches. I am constantly reminded, when I see the perfectly wrapped gifts on social media, that I did not inherit a gift wrapping gene. I end up scribbling an H, an E, a D or an S on a folded up piece of wrapping paper, taping it on a box and calling it done.
This year’s going to be different, thanks to my Cricut Explore Air 2. Gone are those little ridiculous leftover pieces of paper. In their place will be custom, unique Christmas gift tags with glitter or touches of whimsy.
These gift tags serve a few purposes: saving my time on Christmas Eve, making the gifts a little more fun, and giving me an excuse to learn about how to do more with my Cricut! It just takes a little time now, when I’m feeling crafty and playing Christmas carols, and I’m ahead of the game on Christmas Eve. This machine does so many things, I really am only limited by my imagination and willingness to experiment…so experiment, I did, and I’m really happy with the end results.
The Cricut Explore Air 2 isn’t just a cutting machine. It also writes on paper and cardstock! You can use it to make invitations with scrolled edges and colorful font. Address envelopes in a calligraphy style. Draw swirls and patterns on cards. Or label Christmas gift tags with your kids’ names!
Making Christmas gift tags — or tags for any occasion — is simple, using the cut and write option! If you’re intimidated, don’t be. Every little project you make teaches you something and the next item you make is easier!
What You Will Need to Make Christmas Gift Tags
- cardstock in various colors
- Cricut pens or gel pens
- adhesive (I used glue sticks)
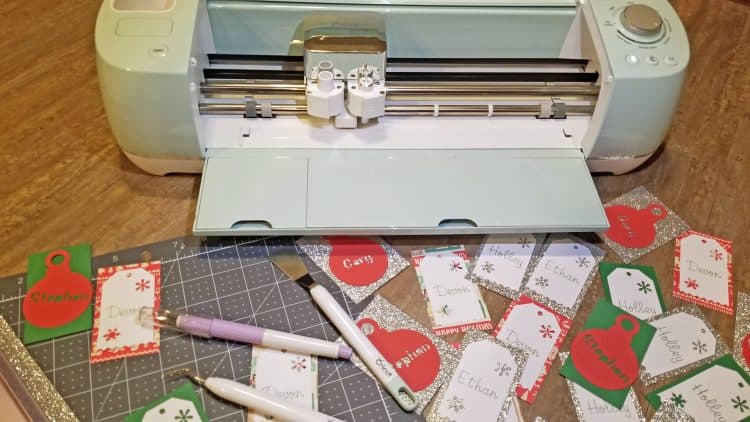
- Cricut Explore Air 2 and weeding tool
- cutting mat and cutter
Open Cricut Design Space in your web browser or on your computer. (Alternatively, you can download the app onto iOS or Android.) Click on “New Project” in the upper right corner to open a blank canvas.
Click on “Images” to the lower left and search for “tag” in the search field. Scroll through the images available until you select what you like. If you’re going to write on the tag, you’ll want to choose one that gives you adequate space. There are a lot with cutouts, which make great layered tags.
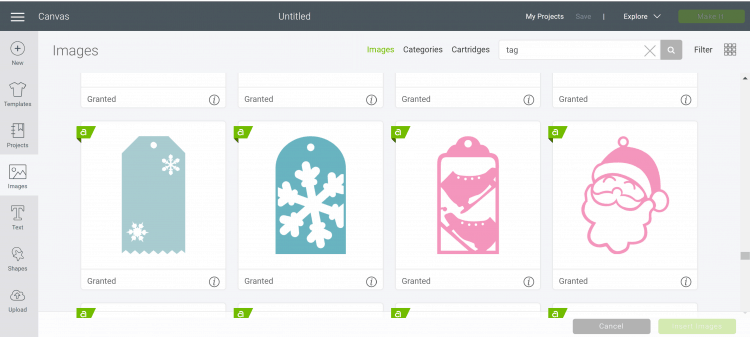
There are a fee for some images, but if you are a Cricut Access member, you’ll have a really wide array of choices that come with the membership. I chose a simple tag with two snowflake cutouts.
Select the image and click “Insert Image” on the lower right. To make multiple tags, you can insert images all over the canvas, or right-click on one you’ve already chosen and click “Duplicate.” You can then reposition that image. You can also resize by clicking and dragging the icon in the lower-right of the image.
To maximize space, I put my images in rows, leaving enough padding/space between each image so you can manipulate them as I’ll later explain.
After you’ve placed all your images on the file, click on “Text” in the nav bar to the left. Type the name of your gift recipient, and while still in the text field, click “Style” and choose “Writing,” which signals to the Cricut machine that it will be doing the writing for you, as opposed to cutting. Then choose the font, size and place the text on your tag.
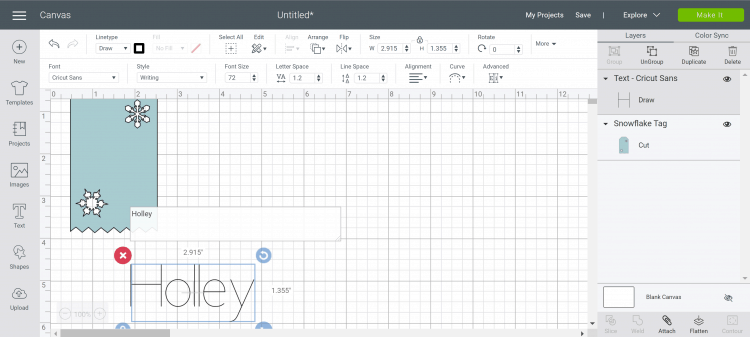
Repeat this for all the images. Then, you’ll want to “attach” the writing to the image. This is simple — click somewhere around the tag, drag the shape to include the tag/text, and then click “Attach” in the lower-right. This turns the image and text into one ‘flat’ object. Do this for each image. Now you’re ready to send it to the machine!
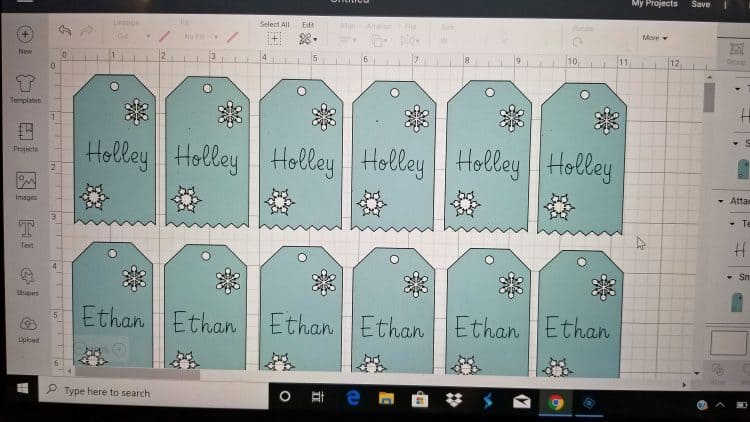
Before you do that, place the cardstock of choice onto your loading mat. When you’re ready, click “Make It” and follow the on-screen prompts to load and write/cut.
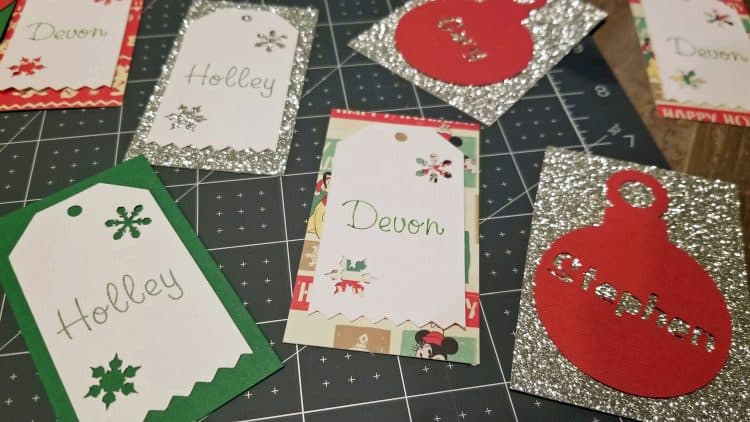
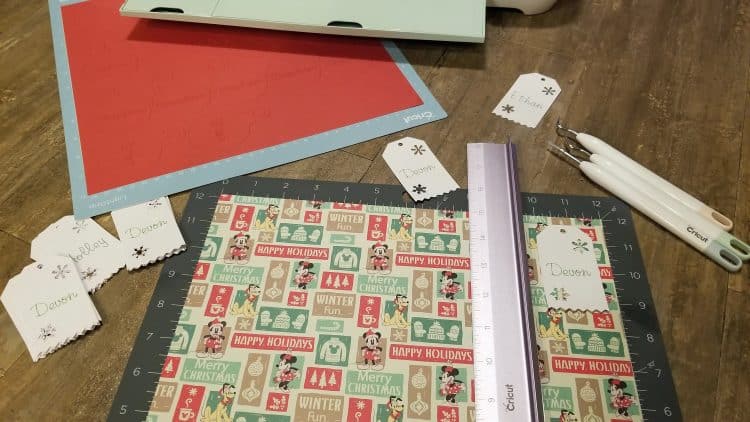
You can stop here, as these make really cute tags, but if you want to make them layered, you can cut additional shapes that are the same size/shape or something different. You’ll be gluing the first tag to its backing, so keep in mind the color and patterns.
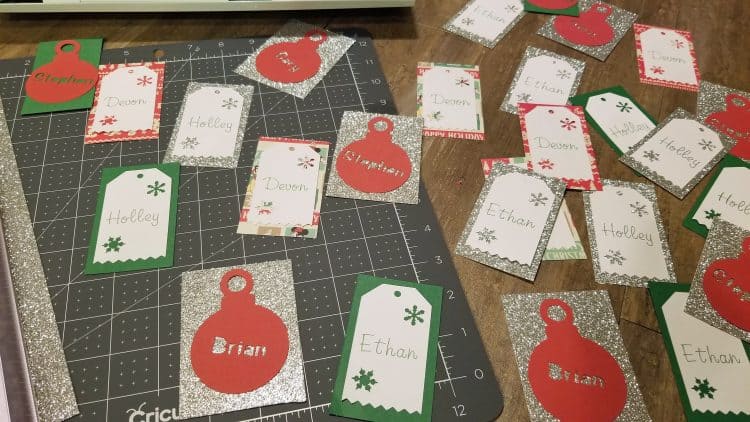
I did a second batch a little differently. I used an ornament tag on red cardstock, and instead of writing on it with a writing font, I chose a font not in the writing category and therefore, the Cricut will cut the name out of the tag. This is fun to put on top of other materials, too. You can see how easy it is to go a little crazy and start making a ton of these, right?
I chose Disney paper for some of them, silver glitter cardstock for others, and then green backing for the rest. Using the big Cricut cutting mat, cutter and flat edge ruler, I cut out a series of background layers.
You can glue the two layers together — or three, if you want to really make them fancy — with a glue stick or another type of roll-on applicator adhesive. You can also buy the little stickers that are 1/8″ thick or more, elevating the top layer from the bottom one, giving it a more 3-D look.
Making Christmas gift tags like this is easy once you know the steps. I am going to be making more next week for friends’ gifts. As much as I love the glitter look, I will say it was harder to glue things to, so I will have to try a different adhesive if I want to use that cardstock again.
I’ll be attaching these tags to the gifts via either ribbon or tape under the bottom. I love the idea that I can use narrow ribbon tied in a bow or even twine!
My next project is based on the movie, Frozen, with some winter earrings and a matching faux leather bracelet. I can’t wait to finish it and share it here on the blog! Here are a couple of recent posts I did with basic Cricut craft directions.
If you’re interested in snagging your own Cricut Explore Air 2, you can do so via this link. (That’s an affiliate link, and there are some great sales going on!) Also head over to Cricut.com for their shopping area, order accessories, an Easy Press or some of the many custom materials to finish your projects. There are also a lot of tutorials for inspiration!
Enjoy your crafting time and let me know what you’re making for Christmas!